Posts

Accelerometer Sensor with Arduino

Image
             What's App Group :-  https://chat.whatsapp.com/I4Nv0YEt1hK3Z9EVjsvngh Instagram :-  https://www.instagram.com/technical_ideas_07/?hl=en                                                                      Arduino Code /*   code started MPU-6050 interface with arduino   #define SDA= A4;   #define SCL= A5;   code created by technical ideas yt   https://youtube.com/c/TechnicalidEas07   #define led1 = 2;   #defineled2 = 3;   #define led3 = 4;   #define led4 = 5;  */ #include "Wire.h" // This library allows you to communicate with I2C devices. const int MPU_ADDR=0x68; // I2C address of the MPU-6050. If AD0 pin is set to HIGH, the I2C address will be 0x69. int16_t accelerometer_x, accelerometer_y, accelerometer_z; // variables for accelerometer raw data int16_t gyro_x, gyro_y, gyro_z; // variables for gyro raw data int16_t temperature; // variables for temperature data #define LED_LB 2 // LED left bottom #define LED_RB 3 // LED right bottom #define LED_RT 4 // LE

How to Make Car Security Alarm

Image
  Instagram Facebook YouTube   Code :-  https://drive.google.com/file/d/176gv1wHuTo3Qf0-k2gchRk2p39nPUBrO/view?usp=drivesdk Watch the full video and get the Password

How to Make Smart Dustbin

Image
  Massage On   Instagram                                 Arduino Code  :-  // code started  // created by technical idEas // https://youtube.com/c/TechnicalidEas07 #include <Servo.h> //servo library Servo servo;      int trigPin = 5;     int echoPin = 6;    int servoPin = 7; long duration, dist, average;    long aver[3]; //array for average void setup() {            Serial.begin(9600);     servo.attach(servoPin);       pinMode(trigPin, OUTPUT);       pinMode(echoPin, INPUT);       servo.write(0); //close cap on power on     delay(100);     servo.detach();  }  void measure() {    digitalWrite(10,HIGH); digitalWrite(trigPin, LOW); delayMicroseconds(5); digitalWrite(trigPin, HIGH); delayMicroseconds(15); digitalWrite(trigPin, LOW); pinMode(echoPin, INPUT); duration = pulseIn(echoPin, HIGH); dist = (duration/2) / 29.1; //obtain distance } void loop() {    for (int i=0;i<=2;i++) { //average distance     measure();                   aver[i]=dist;                 del

How To Make Automatic Radha Krishna Jhula (Swing)

Image
  If there is any problem to create this project, you can DM on   Instagram Facebook What's app :-  wa.me/916000180664 Group :-  https://chat.whatsapp.com/I4Nv0YEt1hK3Z9EVjsvngh  πŸ‘¨πŸ»‍πŸ’»Code :-  /*   code started #define servo= 9; created by technical ideas   https://youtube.com/c/TechnicalidEas07 */ #include <Servo.h> Servo myservo;   int pos = 0;     void setup() {   myservo.attach(9);   } void loop() {   for (pos = 0; pos <= 180; pos += 1) {               myservo.write(pos);                            delay(4);                                  }   for (pos = 180; pos >= 0; pos -= 1) {               myservo.write(pos);                 delay(4);      } }

DIY Clock Using By Arduino

Image
  Instagram Facebook What's App Group :-  https://chat.whatsapp.com/I4Nv0YEt1hK3Z9EVjsvngh Zip i2c :-  https://drive.google.com/file/d/1-OFtSUA04vZjHdXWHE3MpwxeZq4K6esz/view?usp=drivesdk Zip 16x2 :-  https://drive.google.com/file/d/1-Mv62C4WyZ64ZH1XOaRnttN4s1FuH-iV/view?usp=drivesdk Password :- TechnicalidEas07 I2C Code :-  /* code started #define push1= 10; #define push2= 11; #define push3= 12; #define buzzer= 13; created by Technical idEas (YT) chennal link :- https://youtube.com/c/TechnicalidEas07 diy clock using by arduino */ #include <Wire.h> #include<EEPROM.h> #include <RTClib.h> #include <LiquidCrystal_I2C.h> LiquidCrystal_I2C lcd(0x27,20,4); RTC_DS1307 RTC; int temp, inc, hours1, minut, add = 11; int next = 10; int INC = 11; int set_mad = 12; #define buzzer 13 int HOUR, MINUT, SECOND; void setup() { lcd.init(); // initialize the lcd lcd.init(); // Print a message to the LCD. lcd.backlight(); Wire.begin(); R

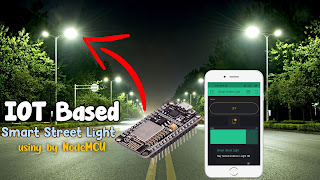
Best IOT Project By Technical idEas

Image
πŸ“Œ  Instagram πŸ“Œ  Facebook πŸ“Œ  What's app  :-  https://chat.whatsapp.com/I4Nv0YEt1hK3Z9EVjsvngh Download Blink  Library BLINK LIBRARY add Video :-  https://youtu.be/gNX2lOuA1Jo     πŸ‘¨πŸ»‍πŸ’» Code :-  /* code started created by Technical idEas (YT) chennal link :- https://youtube.com/c/TechnicalidEas07 #define light = 1; #define sensor = A0; */ #define BLYNK_PRINT Serial #include <ESP8266WiFi.h> #include <BlynkSimpleEsp8266.h> #define led D1 #define sensor A0 char auth[] = "aF2T__AGsARwYsWAfXyfRiAdbTkc_jUz" ; char ssid[] = "Samrat" ; char pass[] = "00000000" ; BlynkTimer timer; void setup() { // Debug console pinMode(led, OUTPUT); Serial.begin( 9600 ); Blynk.begin(auth, ssid, pass); timer.setInterval( 500 L, sendSensor); } void loop() { Blynk.run(); timer.run(); } void sendSensor() { int LDR = analogRead(sensor); if (LDR < 15

How To Make WiFi Jammer Using by ESP8266 mini

Image
  Software :-  https://drive.google.com/file/d/1-9s7sj15ATiX8__HhG3FrPQWxdvFRl56/view?usp=drivesdk Instagram:-  https://www.instagram.com/technical_ideas_07/?hl=en YouTube :-   https://youtube.com/c/TechnicalidEas07